Solution-命令行环境
任务控制
- 我们可以使用类似 ps aux | grep 这样的命令来获取任务的 pid ,然后您可以基于 pid 来结束这些进程。但我们其实有更好的方法来做这件事。在终端中执行 sleep 10000 这个任务。然后用 Ctrl-Z 将其切换到后台并使用 bg 来继续允许它。现在,使用 pgrep 来查找 pid 并使用 pkill 结束进程而不需要手动输入 pid。(提示:: 使用 -af 标记)。
sleep 10000
Ctrl-Z
bg
pgrep sleep # 列出包含关键字 sleep 的进程的 pid > # 76560 # 81186 # 81292pgrep sleep 10000 # 列出包含关键字 sleep 的进程的 pid > # 76560 # 81186 # 81292-a Include process ancestors in the match list. By default, the current pgrep or pkill process and all of its ancestors are excluded (unless -v is used). -f Match against full argument lists. The default is to match against process names.pkill -af sleep - 如果您希望某个进程结束后再开始另外一个进程, 应该如何实现呢?
在这个练习中,我们使用 sleep 60 & 作为先执行的程序。一种方法是使用 wait 命令。尝试启动这个休眠命令,然后待其结束后再执行 ls 命令。
sleep 60 &
pgrep sleep | wait; ls
但是,如果我们在不同的 bash 会话中进行操作,则上述方法就不起作用了。因为 wait 只能对子进程起作用。之前我们没有提过的一个特性是,kill 命令成功退出时其状态码为 0 ,其他状态则是非 0。kill -0 则不会发送信号,但是会在进程不存在时返回一个不为 0 的状态码。请编写一个 bash 函数 pidwait ,它接受一个 pid 作为输入参数,然后一直等待直到该进程结束。您需要使用 sleep 来避免浪费 CPU 性能。
pidwait()
{
   while kill -0 $1 # 循环直到进程结束
   do
   sleep 1
   done
   ls
}
需要注意的是,这里 while 判断的是命令行的返回值而不是布尔值,这个和其他语言有所区别。返回值 0 表示成功所以能够进入循环,参考 这个问题
sleep 60 & pidwait $(pgrep sleep 60)
[1] 554
[1]  + 554 done       sleep 60
pidwait:kill:2: kill 554 failed: no such process
buggy.sh     debug_for.sh html_root    out.log
debug.sh     html.zip     marco.sh
终端多路复用
别名
- 创建一个 dc 别名,它的功能是当我们错误的将 cd 输入为 dc 时也能正确执行。
alias dc=cd - 执行
history | awk '{$1="";print substr($0,2)}' | sort | uniq -c | sort -n | tail -n 10来获取您最常用的十条命令,尝试为它们创建别名。注意:这个命令只在 Bash 中生效,如果您使用 ZSH,使用 history 1 替换 history。history | awk '{$1="";print substr($0,2)}' | sort | uniq -c | sort -n | tail -n 10 62 g++ -std=c++11 tests.cpp 64 npm run src:build 68 git pull 80 ./a.out 118 git status 186 ll 258 cd .. 263 git push 376 git add . 1066 ls
配置文件
让我们帮助您进一步学习配置文件:
为您的配置文件新建一个文件夹,并设置好版本控制 在其中添加至少一个配置文件,比如说您的 shell,在其中包含一些自定义设置(可以从设置 $PS1 开始)。 建立一种在新设备进行快速安装配置的方法(无需手动操作)。最简单的方法是写一个 shell 脚本对每个文件使用 ln -s,也可以使用专用工具 在新的虚拟机上测试该安装脚本。 将您现有的所有配置文件移动到项目仓库里。 将项目发布到 GitHub。
   ~ $ mkdir ~/gits/dotfiles   # gits 目录是创建用来存放所有 git 及 github 仓库的目录
   ~ $ git init ~/gits/dotfiles
   # 将本机的配置文件,如 .vimrc/.bashrc/.tmux.conf 等复制进该目录
   ~ $ ls -a ~/gits/dotfiles
   .  ..  .bashrc  .git  .profile  .tmux.conf  .vimrc  .zshrc
   # 其中,". .."分别表示本目录及上级目录,".git"为 git 仓库的配置文件,其他文件为存放在仓库中的系统配置文件
- 学习下一讲的 git 操作后,可以创建 Github 帐号,将这个仓库 push 到 Github 上
-
在另一台机器,或虚拟机上,将上面的 Github 仓库复制下来
 ~ $ git clone

 ~ $ vim autoconfig.sh   # 创建脚本
 ~ $ cat autoconfig.sh
 #!/bin/bash
 files=$(ls -a $1 | grep -E '.[^.]+' |grep -v .git)
 # 去掉 ls -a 返回结果中的 ". .. .git"
 for file in `echo $files`; do
     ln -s $1/$file ~/$file # 创建软链接
 done

 ~ $ source autoconfig.sh
 # 执行脚本,为dotfiles中的配置文件创建在主目录 ~ 下的软链接
远端设备
进行下面的练习需要您先安装一个 Linux 虚拟机(如果已经安装过则可以直接使用),如果您对虚拟机尚不熟悉,可以参考这篇教程 来进行安装。
- 前往 ~/.ssh/ 并查看是否已经存在 SSH 密钥对。如果不存在,请使用
ssh-keygen -o -a 100 -t ed25519来创建一个。建议为密钥设置密码然后使用 ssh-agent,更多信息可以参考 这里;ssh-keygen -o -a 100 -t ed25519 ls ~/.ssh config id_ed25519 id_ed25519.pub known_hosts - 在.ssh/config 加入下面内容:
Host vm
   User username_goes_here
   HostName ip_goes_here
   IdentityFile ~/.ssh/id_ed25519
   LocalForward 9999 localhost:8888
这里我的远端设备是树莓派,ssh 配置如下
Host pi User pi HostName 192.168.50.56 IdentityFile ~/.ssh/id_ed25519 LocalForward 9999 localhost:8888 - 使用
ssh-copy-id vm将您的 ssh 密钥拷贝到服务器。ssh-copy-pi pi # 拷贝秘钥随后可以直接使用
ssh pi进行免密登录 - 使用
python -m http.server 8888在您的虚拟机中启动一个 Web 服务器并通过本机的http://localhost:9999访问虚拟机上的 Web 服务器 这里我在树莓派上启动一个服务,并在 MacOS 上通过 ssh 端口转发进行访问。pi@raspberrypi:~$ python -m http.server 8888 Serving HTTP on 0.0.0.0 port 8888 (http://0.0.0.0:8888/) ...curl localhost:9999pi@raspberrypi:~$ python -m http.server 8888 Serving HTTP on 0.0.0.0 port 8888 (http://0.0.0.0:8888/) ... 127.0.0.1 - - [15/May/2021 02:45:53] "GET / HTTP/1.1" 200 -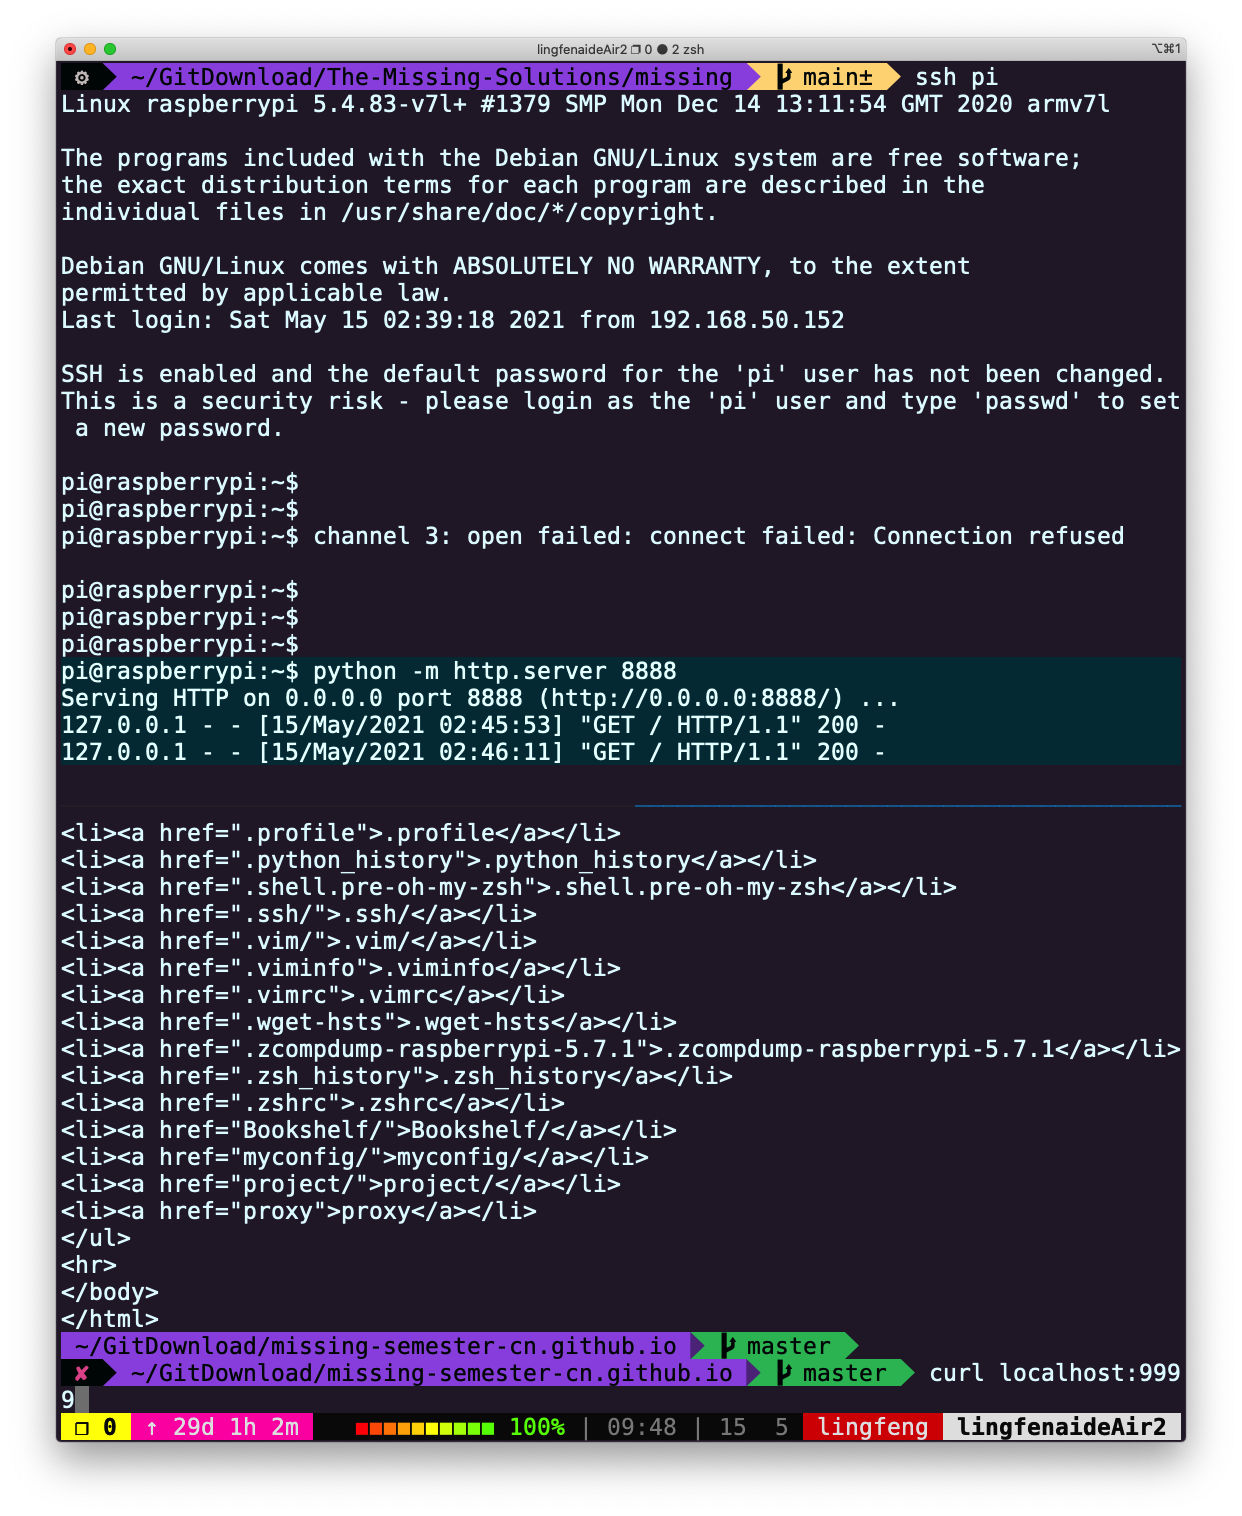
- 使用
sudo vim /etc/ssh/sshd_config编辑 SSH 服务器配置,通过修改PasswordAuthentication的值来禁用密码验证。通过修改PermitRootLogin的值来禁用 root 登录。然后使用sudo service sshd restart重启 ssh 服务器,然后重新尝试。#注意是服务器的 sshd 配置 pi@raspberrypi:~$ vim /etc/ssh/sshd_config修改:
PasswordAuthentication的值为 noPermitRootLogin的值为 no 然后重启服务#for MacOS sudo launchctl stop com.openssh.sshd sudo launchctl start com.openssh.sshd
下面提供的是虚拟机上的操作示例。
- 在虚拟机上创建 root 登录帐号 (login as root)。注意:root 登录 和 root 用户 是不一样的
~ $ VBoxManage startvm "ubuntu_server" --type headless ~ $ ssh my_server # 使用ssh连接成功,跳转到虚拟机的终端 my_server@myserver:~$ sudo su root@myserver:~# passwd root # 输入密码,创建 root 登录帐号 root@myserver:~# vim ~/etc/ssh/sshd_config # 查找到行"#PermitRootLogin prohibit-password",使用 o 在下方新增一行 # 输入"PermitRootLogin yes" root@myserver:~# service sshd restart # 重启sshd服务,使刚才的修改生效 root@myserver:~# exit my_server@myserver:~$ exit # 断开与虚拟机的 ssh 连接- 备注:sshd 服务可能需要重启虚拟机,才能生效(可以直接在终端重启虚拟机,如下)
~ $ VBoxManage controlvm "ubuntu_server" poweroff ~ $ VBoxManage startvm "ubuntu_server" --type headless- 使用 root 登陆 连接虚拟机
~ $ ssh root@192.168.1.9 # 输入刚才设置的密码 root@myserver:~#- 重新配置 sshd,禁用 root 登录
root@myserver:~# vim /etc/ssh/sshd_config # 查找到行"#PasswordAuthentication yes",使用`o`在其下方新增一行 # 输入"PasswordAuthentication no" # 查找到行"PermitRootLogin yes",将 yes 修改为 no root@myserver:~# service sshd restart root@myserver:~# exit my_server@myserver:~$ exit ~ $- 再次尝试 root 登录
~ $ ssh root@192.168.1.9 # 要求输入密码,可是输入密码后,仍会显示 Permission denied, please try again. # 显示 3 次或更多次要求输入密码后,输出 Permission denied (publickey,password) ~ $ ~ $ ssh my_server my_server@myserver:~$- 以上对于
PermitRootLogin及PasswordAuthentication的修改,只影响 root 登录方式,前面使用的ssh my_server登录方式不受影响 - 总体而言,允许 root 登录,是有安全风险的,一般不建议使用。对于已创建的 root 登录方式,可删除:
my_server@myserver:~$ sudo passwd -dl root -
附加题:在虚拟机中安装 mosh 并启动连接。然后断开服务器/虚拟机的网络适配器。mosh 可以恢复连接吗?
- 在虚拟机上安装 mosh
my_server@myserver:~$ sudo apt-get install mosh my_server@myserver:~$ mosh-server - 在终端使用 mosh 连接虚拟机
~ $ sudo apt install mosh ~ $ mosh my_server@196.168.1.9 - 在 VirtualBox 管理器的最上方,“控制(M)”中选择“设置”,在“网络”选项中,将“连接方式”(默认是“桥接网卡”)改为“未指定”,即可断开网络适配器
- 断开网络适配器后,无论使用 ssh,还是 mosh 连接,都不能主动恢复连接(需要重新修改虚拟机的网络连接方式)
- mosh 在断开连接后,会有提示,告知:连接断开,在尝试重连
- 重新连上网络适配器后,ssh 或 mosh 连接都能恢复(而且断开后连接虚拟机输入的内容能继续显示),只是 mosh 的延迟稍微小一些
- 在虚拟机上安装 mosh
- 附加题:查看 ssh 的
-N和-f选项的作用,找出在后台进行端口转发的命令是什么?-N Do not execute a remote command. This is useful for just forwarding ports. -f Requests ssh to go to background just before command execution. This is useful if ssh is going to ask for passwords or passphrases, but the user wants it in the background. This implies -n. The recommended way to start X11 programs at a remote site is with something like ssh -f host xterm. If the ExitOnForwardFailure configuration option is set to ``yes'', then a client started with -f will wait for all remote port forwards to be successfully established before placing itself in the background.- -N 就是不执行远端命令,适用于端口转发的情况
- -f 是让 ssh 在执行命令前切换到后台运行
后台进行端口转发
ssh -fN -L 9999:localhost:8888 pi
Licensed under CC BY-NC-SA.